A Simple Method to
Assemble Fine Drawers

by David Knipfer


Well... my head got to feeling a little better after lunch, so I went ahead and finished off the last 5 of a group of 26 dovetail drawers for some boxes.

As I was finishing the dovetails in the last drawer, I thought that maybe some of you might be interested in
  • my methods to assemble the drawers...
  • not the joinery itself...
  • but the strategy and techniques to fit a tight bottom into a fine drawer.

  • Soooo... this photo post shows just that...
  • techniques to complete the assembly of a drawer.

  • It's kind of an esoteric topic I know... so read on if it interests you.

    There are about a gazillion methods to assemble a drawer... and a good read of nearly any comprehensive Woodworker text will show at least a few examples.

    Alas... for us smaller scale Woodworkers, there is scant published knowledge about making smaller drawers.
  • The techniques that I have developed over the years are mostly from trial and error.

  • The goal in my box drawers is to fit a plywood bottom into the drawer so that the bottom is tight enough to square the drawer, and is also fully bedded inside the drawer perimiter.

  • Here is what I do...

  • First, you need to build a drawer.

  • These principles will work with any drawer joinery you wish to use...

  • I prefer to use through dovetails at the back and half-blind dovetails in the front.

  • Here is the last clean-up swipe on todays drawer joints...
  • Once your drawer joinery is done and dry fit to satisfaction, then, you can get busy to install the drawer bottoms.

  • I prefer to use 3mm plywood bottoms
  • fit into 1/8" routed grooves...
  • installed so that there are no gaps extending through the drawer sides.

  • Since the routed grooves are all made referencing the bottom edge of the drawers... first step for me is to be sure that the bottom corners of the dry fit box are all at the same level.

    If I find a drawer that has a slight corner mis-alignment...
  • I dry clamp the drawer and flush plane the offending corner.


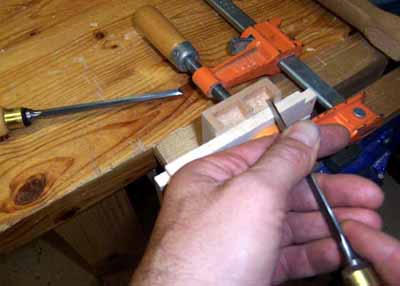
  • I worry, right now, only about the botom edges...
  • I leave any top corner problems for after glue-up.

  • Why is this step important?

    Well... do the math...

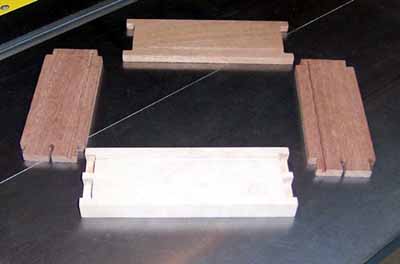
  • I am fitting 3mm (0.118" thick) plywood
  • into 1/8" (0.125") grooves...
  • soooo... any error bigger than 7/1000" in a corner and the bottoms will not fit.

  • Do what it takes to get the bottom corners in the same plane before proceeding with the grooves.

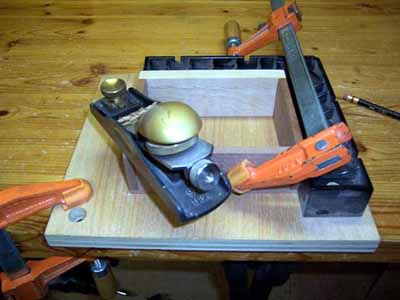
  • This dry-fit stage is also a good time to
  • squiggle a pencil line along the approximate point where the bottom grooves will go.

  • If you look closely, you can see the pencil lines on that photo above.

  • I do this because I have grown sick and tired of cutting the grooves along the wrong edge...
  • trust me... when the drawers are all sitting in a pile, the top edge and bottom edge look quite similar.

  • The pencil line is just another mental reminder of what to do.

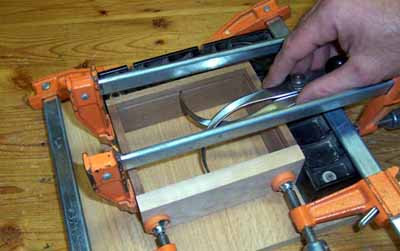
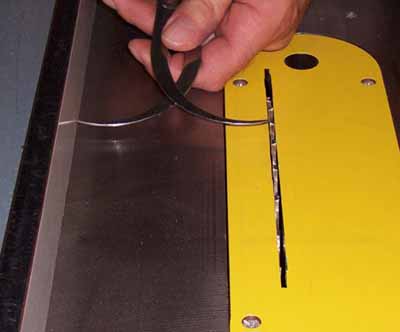
  • Now, on to making the making the grooves for the bottoms...

    First, I ask you to consider
  • dumping from memory all those articles we have all read that encourage you to wack them out on the table saw or router table... thereby,
  • leaving the infamous 'gap' at the back that somehow gets magically filled with plugs or such.

  • That may be fine for some work... but fine little drawers deserve a better treatment.

  • Use your plunge router and an edge guide to
  • route stopped grooves on the tail boards (side pieces)... the groove stops just before penetrating the rear tail.


  • The pin boards (front and back) can be routed all the way through.

    Your parts will look like this when the routing is done...

  • All those grooves are cut with a 1/8" spiral upcut bit...
  • with a plunge router and edge guide...
  • guided off the bottom drawer edges, which we have already checked to be sure are co-planer.

  • Dry fit the drawer again and clamp it square.

  • Now you need to cut a bottom piece that fits those grooves exactly.

  • This is the point where you want to avoid using any measuring tools that have numbers on them...
  • truly... there is no reasonable way to measure to the inside of those grooves and transfer that exact dimension to your saw.

  • So, instead,
  • I encourage you to learn the use of relative dimensioning here.

  • Relative dimensioning is where you can transfer measurements without ever knowing what they actually are.

  • The tool I use in this case is a set of calipers...
  • a tool with adjustable legs that can be set and locked to any width.

  • First, I use the calipers to find the width of the drawer groove...
  • I leave just a small amount of clearance...
  • just enough to wiggle the calipers...
  • maybe .020" or so ...


  • Then, it is a simple matter to set my rip fence using that caliper setting...


  • I don't have any idea what that dimension 'really' is... but
  • I know that when I rip the bottom material it will be a perfect fit to the drawer grooves.

  • Ahhhh... the power of relative dimensioning.

    Rip enough material for the bottoms at that width.


  • Take your calipers back to the clamped up drawer and
  • size then to the other dimension.

  • Transfer this caliper dimension to your saw by using a Stop Block on your miter gauge...


  • Then, crosscut your strip into lengths at that setting.

  • Thats it... you should now have perfect fitting bottoms that slide like gloves into your drawers.

  • Dry fit them all again with the new bottoms in place just to be sure.


  • Sand the insides to your satisfaction then glue them up.


  • Thats all I have to say about this topic.

    Enjoy

    Knipfer


    This site is maintained by:
    Good-Lyddon Data Systems

    Copyright © 2004-2010 Joe Lyddon, WoodWorkStuff.net