Installing Knife Hinges
By David Knipfer
April 2005


On occasion, I'll build a jewelry cabinet that has a set of doors enclosing the drawers.   I'm working on one now.

Typically, I turn to
  • Brusso knife hinges to hang the doors...
  • they are a clean and somewhat elegant way to do the job.

  • Now... I admit that true wood hinges like the Genious makes are a better choice... but I'm not at that level.

    So... for us mortals,
  • knife hinges are a definite step above butt hinges and I'm not embarassed to use them in my work.

  • The problem for me, initially with these hinges... like most hardware... is that good,
  • detailed installation instructions are hard to come by.

  • The typical 'author' would say something like... "Locate and cut matching mortises for the hinges so the doors swing properly."

    Uhhhhm... OK... its a correct statement but kinda short of the how-to part.

    Anyways...
  • Here, I'll show all the details of how I install these hinges.

  • Well...
  • first you need a carcass and a set of doors.

  • It's important when you are building the doors to
  • be sure they are not undersized in length.

  • Essentially... you want them to
  • just barely fit into the carcass opening
  • before the hinges are installed...
  • maybe 1/32" of clearance or so.

  • In this photo my raw doors are sitting inside the carcass.

    The first task at hand is to
  • locate and cut the carcass mortises for the hinges.

  • Precise layout of the mortise locations is critical to a clean installation.

  • It's easy to do if you use some
  • relative dimensioning principles.

  • Take another look at that photo, right...
  • you'll see some 1/16" thick strips of scrap that I have
  • taped to the carcass front top and bottom...

  • This spaces the doors away from the carcass front and
  • allows me to locate the mortises without any measuring.

  • So, with your doors in position and spaced away from the carcass...
  • locate and mark the centerline of the carcass mortises.

  • This centerline happens to be the
  • center of the door thickness.
  • I use a pencil to place a mark at this point...
  • mark all 4 mortises.

  • Now you need to
  • locate the exact end of the mortise... that is it's length.
  • Remove your doors and
  • place a male hinge leaf against the carcass side, such that
  • the pivot rod of the hinge is flush against the carcass end.
  • Mark the end of the hinge.

  • Using the hinge, to locate the carcass mortise end, will allow us to easily have the
  • doors exactly flush with the carcass sides... you'll see that in a little bit ....

  • Now... with those centerlines and ends marked...
  • disassemble everything and
  • use an accurate square to
  • extend those marks to
  • locate the exact mortises.


  • Note: The 'squiggly' pencil line is the mortise that I need to make (4 actually)... and
  • the piece of tape on the end
  • helps to control tearout while routing.

  • Note as well, that, at this point, I have not yet shaped the box top...
  • it's always a good idea to cut your joinery
  • while things are still square.

  • Anyways... now you can go ahead and
  • route the mortises to remove the bulk of the waste.

  • I use my plunge router with an
  • edge guide fitted to do this.
  • Note in the following photo that I also add an 'extension' to the stock edge guide to keep it from falling off the corner at the end of the pass.

  • For the hinges, I use... the small
  • Brusso knife hinges...
  • they require a 5/16" wide mortise.
  • The leaves on these hinges are 0.095" thick... so
  • I set my router on scrap to cut at a
  • depth of 0.100".

  • With all 4 carcass mortises routed, it's time to
  • chisel the ends square.No mysteries here...
  • you want the mortise to end exactly at the stop line you drew.

  • I find it helpful to
  • use a pencil to extend the edges of the mortise to the stop line... and to
  • chisel the stop line first,
  • this prevents the long grain fibers from tearing past the stop line.

  • With that complete...
  • reassemble the carcass and it's
  • time to move on to the doors.

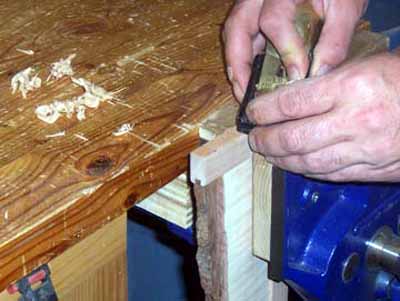
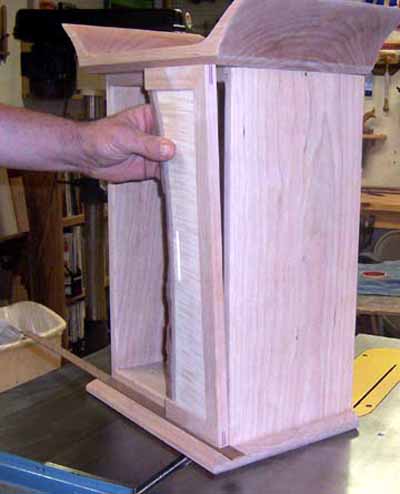
  • Working the doors, to get them to fit properly, is surely
  • the most critical step in this process.

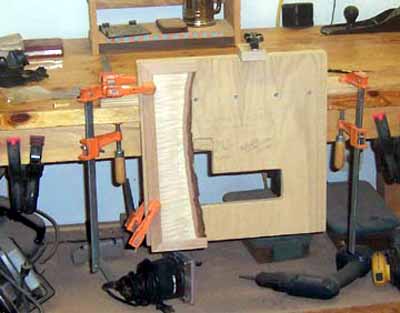
  • They need to be fit to the carcass
  • before you begin working on their hinge mortises.

  • Take your time and get them to fit properly... otherwise,
  • it is impossible to have a clean, professional appearance.

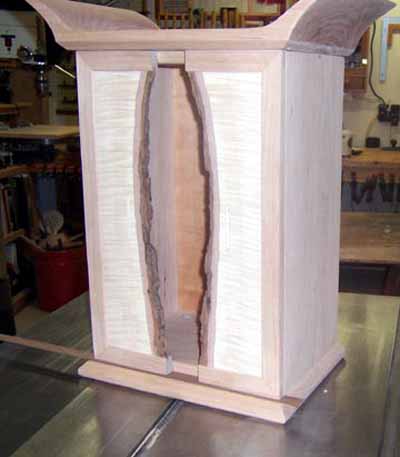
  • Here, in words, is what I mean by a
    'proper fit' of the doors...

  • They should be of a length that allows a smooth swinging of the hinges while square to allow their outside edges to align exactly with the carcass sides.

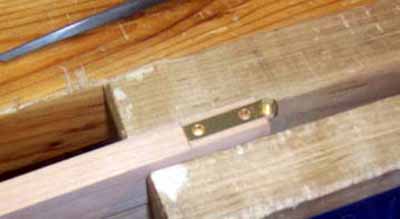
  • For the hinges I use...
  • the minimum "door to carcass" gap possible is 0.050"...
  • that is the dimension used by the hinge pivots and
  • means there is absolutely zero free clearance... and
  • anything above 0.130" the top door
  • will not engage the hinge pivot.

  • Sooooo...
  • there is some room for error... but not a lot.

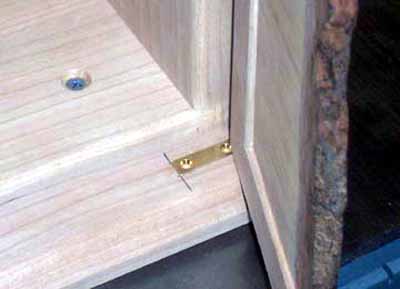
  • I choose to make the doors a final width of 0.075" smaller than the carcass gap.
  • This leaves a miniscule 12/1000 of an inch open clearance at the door top/bottom when the hinges are installed.

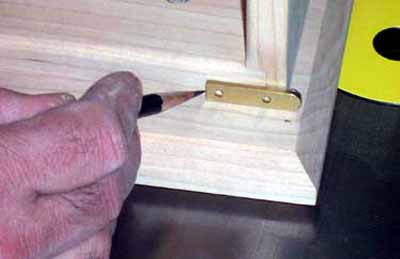
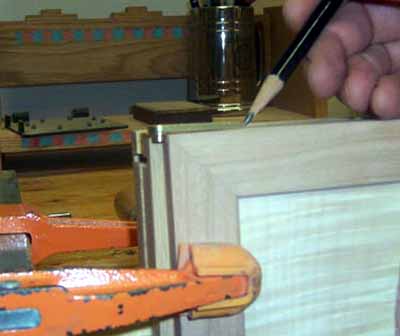
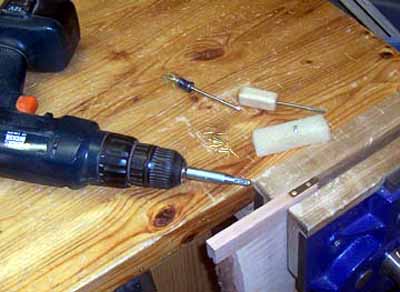
  • To arrive at that gap,
  • I again turn to relative dimensioning...

  • Tape a piece of scrap to the carcass bottom of the clearance you want
  • (75/1000 in this case)... and
  • try to fit a door into the opening.

  • It had better not fit at this point. :)

  • Now, it's a matter of taking your time to slowly trim the doors to size...

  • I use a block plane... use whatever you are comfortable with.

  • A few passes... check the fit and square... a few more passes...

  • Soon, you will have the proper fit and then, you are home free.

  • Now, it's time to
  • locate and cut the hinge mortises for the doors.

  • We are essentially doing the same thing here we did for the carcass... but
  • those doors are a little harder to clamp down for routing.

  • A few years back,
  • I built this door routing fixture...
  • it allows me to clamp various size doors vertically while
  • the double width of 3/4" ply at the top edge
  • helps keep the router from tipping.

  • The centerline of the door mortise
  • is the centerline of your door width...
  • but it's not critical to be on the exact centerline.

  • I set my router as close as I can to that centerline... then,
  • ALWAYS be sure to have the same face pointing out while routing.

  • This allows the hinge mortises to be exactly in-line top to bottom...
  • even if they are a little bit off true centerline.

  • The length of that door mortise is critical...
  • you want the doors to be parallel with the carcass edges
  • when the hinges are fully slid into the mortise.

  • No worries about that I say...
  • just repeat the process of using the male hinge leaf
  • to locate the end...
  • just as we did on the carcass mortises.

  • I promise you here... if your doors are fit properly using the male hinge leaf, in this way,
  • I will guarantee you perfect edge alignment between the carcass and doors.

  • Soooo...
  • route and clean up the door mortises.
  • The female hinge leafs should fit just right up to the mortise stop.

  • Now is a good time to check everything...

  • Slip the hinges into place and fit the doors to the carcass.

  • Do all the hinges slide to the end of the mortises?
  • Are the door edges aligned with the carcass edges?
  • Is the gap even top and bottom?

  • Correct whatever you need to...
  • whatever your patience and spirit allows.

  • Then,
  • it's time for the hinge screws.

  • I'm quite certain that you folks can get those screws installed without any words from me...

  • But just in case here are a few pointers.

  • Do not attempt to fit the screws with the carcass assembled...
  • take the time to take it all apart again and have some room to work.

  • Here are the tools I find essential to fitting small brass screws... (see photo)

  • Thats a Vix Bit installed in my cheapo drill...
  • that Vix Bit is absolutely essential to the task.

  • IMHO, it is one of those rare tools that
  • performs just one specific job perfectly well.

  • If you are not familiar with them... then
  • do not ever drill another hinge hole
  • until you have one of your own.

  • A steel starter screw is sitting impailed here in my block of pure beeswax... and
  • the #2 brass screws are ready to go.

  • Drill each hole with the Vix Bit...
  • lubricate that steel screw and
  • drive it all the way in... then
  • finally follow with the brass screws.

  • For goodness sake
  • don't skip the steel starter screw...
  • if you break off one of those teeny brass screws,
  • then what are you going to do?

  • Once all the screw holes are in place... then I
  • screw the female hings leafs to the doors...
  • fit the male halves over them and
  • slide the hinge/door assemblies into the carcass mortises.

  • Then its an easy thing to
  • swing the doors open and
  • drive home the brass screws into the carcass mortises.

  • And that's all there is to it, friends.

    Last photo here... a well fitted set of doors, swinging smoothly on Brusso knife hinges...

    And a grey headed WW reminding you to wear all your PPE (Personal Protection Equipment).

    I hope all this typing encourages someone out there to use this hardware in their own creations.

    Now I need to make some drawers.

    Thats all.

    Enjoy

    Knipfer


    This site is maintained by:
    Good-Lyddon Data Systems

    Copyright © 2004-2010 Joe Lyddon, WoodWorkStuff.net