My most complex veneer job ever
June 2004
By John Fry


It has been a while since I have put any work up on Woodnet and I thank those of you that have sent PMs asking where the heck I have been.   I have just been damn busy!

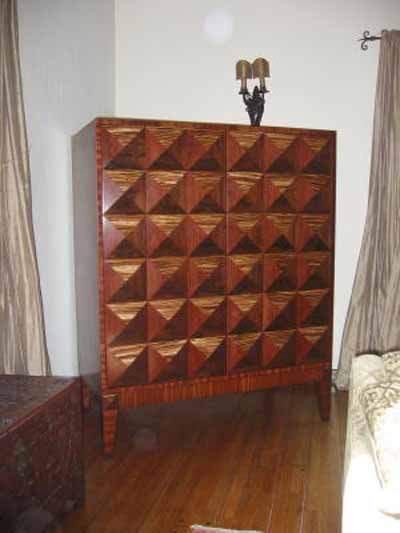
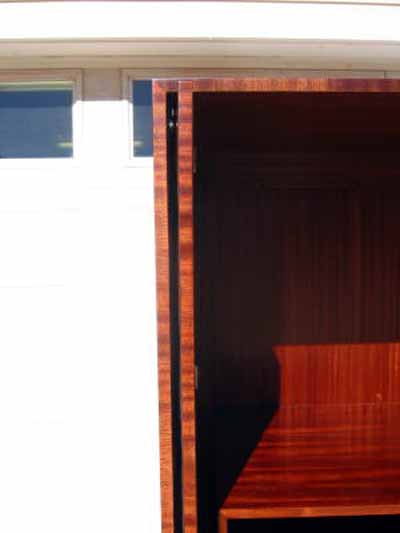
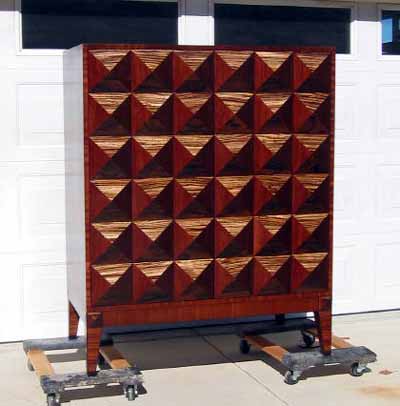
  •   This TV armoire is a commissioned piece that is 100% veneered.

  •   The carcase is done in qtr sawn sepele, 
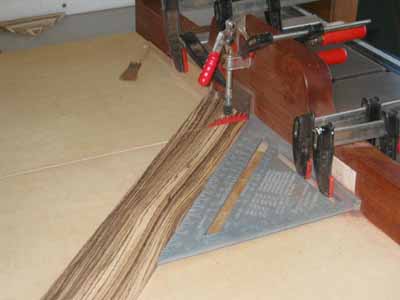
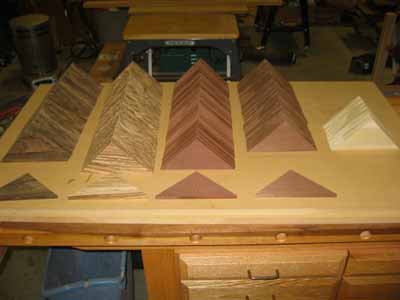
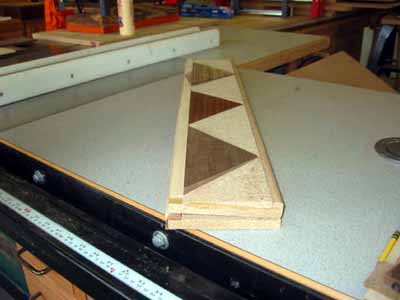
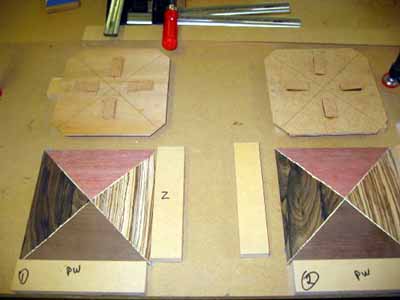
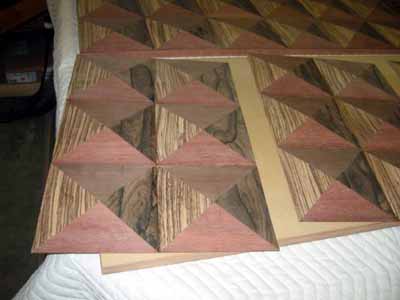
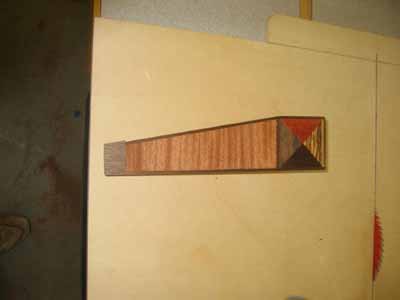
and each door is done with 36 "pyramids" of Zebra, Peruvian Walnut, Ziracote, and Jarrah.

  •   This unit measures 48 1/2 inches wide, 62 1/2 inches tall, and 27 inches deep.

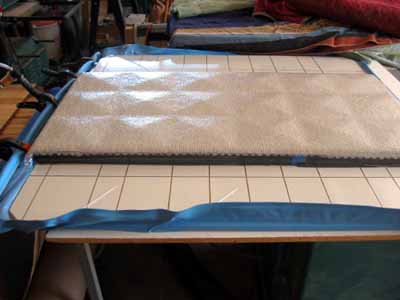
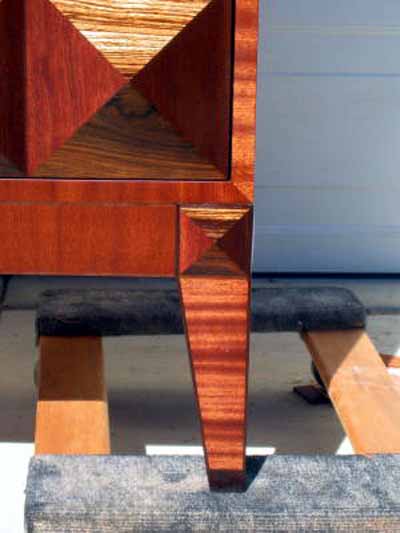
  •   The edges of each carcase panel, the doors, the aprons, and legs are veneered with the ribbon grain of the sepele being cross banded.

  •   The designer and clients spent three weeks sorting through 63 pieces of exotic wood samples to come up with final choice.

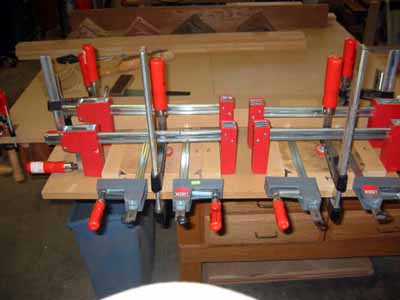
  •   I have 250 hours of shop time in this piece.


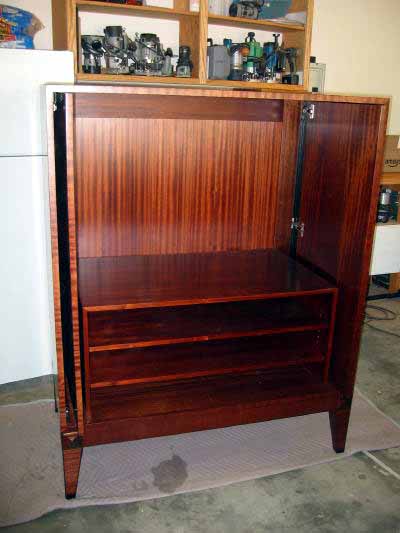
  • This shot shows the inside of the cabinet with the doors opened and slid back into their pockets.


    Delivered, and in the clients' home.

    Whew!

    They loved it!!
  •   Every piece of veneer used is "shop-sawn".

  •   This is 60 pieces of 6 1/2 inches X 54 inches X 1/16th inch thick Sepele.

  •   This was re-sawn at 3/32 inch thick from 4/4 stock and then drum sanded to thickness.

  •   The sheets where edge glued together, and then veneered to 3/4 MDF substrate using a vacuum press.

  •   Here are the exotics for the front doors after re-sawing to 7/16 inch thick.

  •   They were then sanded and ripped to width.

  •   I called the squares pyramids because they are

  •   3/8 inch thick at the center point where the four pieces meet, and

  •   beveled to 1/16th thick at the outer edge.

  •   To cut the triangles, I rigged, and tweaked, and attached stop blocks and a hold down to my crosscut sled.

  •   I micro tweaked a speed square as a fence.

  •   Every angle had to be perfect with these cuts or the 72 pieces in each door would not glue up right.

  •   At each corner where four squares meet, there are eight pieces of wood.

  •   If they are not all exactly 45*, there will be gaps.

  • Here they are, and yup, they are all perfectly cut.   Those are poplar pieces on the right to help with the set up of the beveling sled that will cut the taper on the faces of each piece.
  •   This is the sled that holds each triangle at the correct angle to cut the face bevels.

  • I used my little planer for this and had everything "charted" out.   The start point, how many quarter turns, how many passes, and when to stop before it cut into my sled.   This shot shows three pieces of Ziricote going through.   After this, I ran two passes through the Performax drum sander.
  •   I used clamping fixtures for the glue ups.

  •   I taped the backs and then applied glue to the edges.

  •   The cork blocks on the hold-down plates are attached at the same angle as the bevels.

  •   These upper plates are cut perfectly square and not only allow me to apply downward pressure while gluing, but also limit the compression to the exact 7 3/4 inch square width being applied by the side way clamps.

  •   Here are two sets clamped in the fixtures.

  •   I had to make 36 of these squares and wished I could do more than two at a time.

  • I then made fixtures to glue three squares together, and then glue them up in sixes.   They were getting pretty fragile to handle because of the weight and only being edge glued on a 1/16th inch thickness.   I was afraid they would break as I tried to lift and move them around, so I stopped at six.   This left three panels of six to be laminated to each door.

  •   This was the moment of reckoning.

  •   If these puppies aren't perfectly square, I will never be able put 36 of them together, and laminate them to a perfectly square door substrate and make it look right.

  •   Plus, the door back and edges had to be veneered before putting on the fronts and

  •   there was no way the front could be trimmed afterwards or the squares would not be true.

  •   It had to be perfect or it was trash.

  •   I couldn't believe it!

  •   They were so square it was frightening!!

  •   Here is one door in the press.

  •   I used a piece of very heavy berber carpet as the top caul to get even pressure.

  •   You can see the pyramidal shapes through the carpet.

  •   I tapered, veneered, edge banded and then

  •   inlaid miniature pyramids into the legs.

  •   I used loose M&Ts to make the base so I had adjustment capabilities.

  •   It was screwed into the lower carcase panel with many screws through mounting blocks screwed to the aprons.

  •   I had to re-work my beveling cross cut sled to accommodate and cut a perfect 45* miter on the 27" inch wide panels.

  •   The bricks are a counter balance to keep everything from falling off my saw when I pulled it back to start the cut.

  •   Once again, I couldn't believe how great these mitered corners came out when I did the glue up.

  • This is a detail shot that shows how the edge treatments were cross banded with the Sepele on both the carcase and door edges.
    This detail shot shows the inlaid leg next to the bottom of the door.

    I have done a lot of veneering, but never anything like this.   This is the highest price piece I've ever done, but this piece just plain sucked me in to its complexities.   It sucked me into the detail, and planning of each process and procedure.   I found myself obsessed with the extensive jig and fixture making as I knew everything had to be perfect or it just wouldn't work

    I guess what I'm saying is that I knew half way in, that I'm spending way too much time on this and not making any money, but the challenges where exhilarating.

    I'm sorry if this post is too long.   I'm still really wired about this project and it reflects in my post.


    John

    Chisel And Bit
    Custom Crafted Furniture
    www.chiselandbit.com


    This site is maintained by:
    Good-Lyddon Data Systems

    Copyright © 2004-2010 Joe Lyddon, WoodWorkStuff.net