|
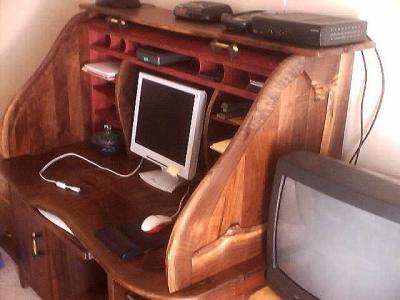
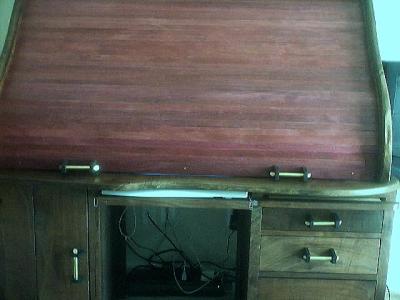
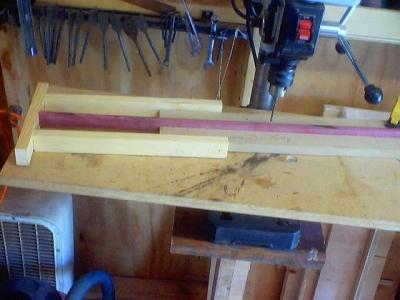
Rolltop desk brag Gene, 03-24-2004 10:03 AM Ok, this was my most ambitious project to date. Rolltop computer desk. Tambour was cabled (3 strands) made of Purpleheart, Insert likewise mostly purpleheart w/walnut. Remainder of desk is walnut, except drawer boxes are poplar w/beech ply bottoms. Pulls are brass w/macassar ebony. Drawers and pull out shelfs are have dust shelfs between them. The walnut was locally grown roughsawn, which I'd bought from a neighbor's mill a couple years ago. The tambour was fun - a jig is absolutely essential for drilling cable holes. Don't even think about freehanding it if you go this route. Measurements must also be very precise for the entire upper assembly, to avoid binding or interference with insert. Purpleheart is kinda heavy, and I don't think I'd use it again for a tambour unless I wanted to build up biceps. Here are some pics - sorry about the fuzziness, just have a cheapo digital camera, and the colors are a little off. |
|
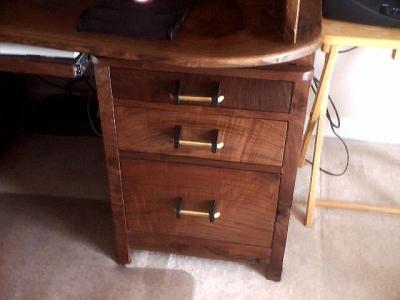
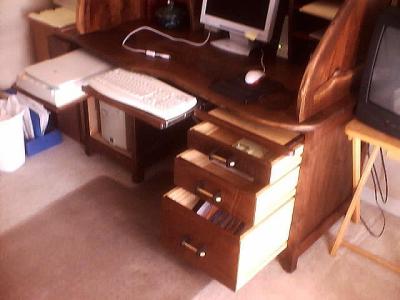
Alden Miller, 03-24-2004 10:57 AM Wow! I especially like the frame of the sides on the top of the desk. I like the way you incorporated the natural edge of the wood. -Alden louie, 03-24-2004 11:14 AM Absolutly beautiful.. You did an excellent job.. What plans did you use.. I really could use a desk like this for my small office space.. lou jtomas, 03-24-2004 11:31 AM Yeah.. Natural edge of the wood on the sides is a really nice touch! Great job! Jeff Gene, 03-24-2004 01:07 PM Thanks for the ego boost y'all! I'll try to answer some of the questions that have been asked. I didn't pay much attention to bdft used, but here's the basic dim's. Base top is approx. 54"w x30"d x 1" thick (front to back of top varies because of slab shape). Right Pedestal is 18"w x 23"d x 27"h. Left pedastal is same except width is 16 1/2". Knee hole is 19". Roll top is 24"h (not counting top shelf) x 49"w x 28"d (again approx. due to shape). Insert is 21 3/4"h x 9"d x 47"w, Monitor hole centered and 22"w x 17 1/2"h. Note that the top row of cubbies are only 6" deep to accomodate tambour when open. Tambour rides in 3/8"x3/8" slots which must be widened a bit at the sharpest curves. Slats sized accordingly. Took 38 slats for this one, which required resawing and planeing 4/4 purpleheart (THAT was fun!). Lot's of splinters w/ purpleheart by the way. Each slat is routed w/ a bead and corresponding flute, which takes a little time to set up so the slats don't bind. Pays to practice on some scrap first. Bit was obtained from Lee Valley - 3/16" rad Bead & Cove Bit-1/2 shank (16J2852), as were the hinges for the bifold door on left ped. As for plans, I drew up my own, but give credit to inspiration from a wide variety of sources. Google for rolltop desk will get a few hundred hits. There is a complete plan for a basic rolltop on the Shopsmith site A lot of this depends on the size of the monitor, cpu, scanner, printer, etc. that you want to stuff into it, so it's very custom for my particular needs. If you decide to enclose the cpu, make sure it's got plenty of ventilation or it'll be toast. Oh, yeah almost forgot; the side panels of the pedestals are 3/4" cabinet plywood veneered w/walnut, backs are 1/4" birch ply also veneered. This was really alot of fun to build, and I learned a lot. Took about 2 months altogether - I wasn't in any hurry. Thanks again guys. Joe Lyddon, 03-24-2004 01:17 PM Gene, You're the first person I've seen that has used the wire method on a Tambour! I've been interested in it for some time... thinking it would be better than the canvas method (can see the nice wood from both sides). Could you go into a little more detail on it? Slat cutting... special angles / cuts? Slat size? Wire type / size? Wire anchoring at the ends? Special knots / twists, etc.? You said you used 3 strings... ends and middle? Can you see between the slats? Slats must be perfectly cut? Drill bit size? ... etc... Thank you & Have FUN! Joe Gene, 03-24-2004 02:31 PM Joe, the wire tambour was fun. If you're going to try it, here's what I did.... Make sure you get planks that are as straight and free of tension as you can, and get some extra. I planed mine at 3/8". Cut to length (mine at 47 1/2"). Decide and mark the inside and outside faces of each plank. Then cut small tenon on the inside face of each wide plank so that it's 1/4" thick by 1/4" deep. Rip your slats to width (1" for me), again keeping each slat in order and all face up (or down) allowing enough for the bead and flute routing - approx 1/4" nest on each slat after they're routed. You will likely have some slats that will come out warped after ripping, so choose the ones which are the straightest. Route each slat, production line fashion, making sure to keep all slats in order they will be assembled, from this point forward. Be careful to not go the full depth of the router bit, you only want enough to keep each slat engaged with it's partners. You'll need 1 slat wider than others for the handles (1 1/2" or so) and to secure the cable too. Drilling - I made a simple jig to hold the slats on edge, 3 holes in each) center and about 4" in from ends) and must be perfectly aligned both in center of slat thickness and distance from ends. I found it easier to align everthing after routing, and to drill from the flute side. Drill holes 1/64" larger than wire rope. |
|
Used three, 1/16" wire rope sections from big box store,
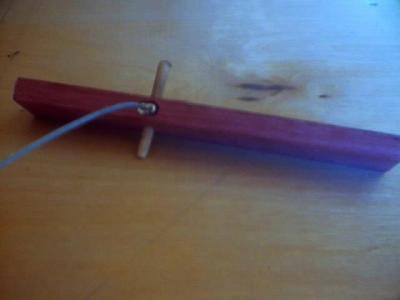
and corresponding stops and loop crimps available right next to the rope. When you cut this use sharp cutters and leave yourself plenty of extra length to work with. On the wide slat you use for the handles, you'll need to drill holes on the top edge (mates w/next slat) large enough to accomodate the loop and the crimp of each wire, then drill a hole thru the thickness for a 1/4" piece of hardwood dowel which will hold the loop in place. If you plan ahead (which I didn't) you can disguise the dowels with the handle placement. While you're at it, cut 3/4" notch out of the tenon on each end (bottom side that will touch desk top when closed). If you don't it won't go around the bends. You could also use dowels on this slat rather than tenons. Make your wire rope loops just large enough to accomodate the anchoring dowel. Cut off excess as close to crimp as you can, then insert in hole and drive glued up dowel through to secure it. You shouldn't have any of the crimp sticking out. Then thread remainder of slats. Lay it out on the grooves you've routed in the sides for a test fit before you finish off the last slat with a crimp stop. You may find you have to add or subtract a slat or 2 from the assembly. Tension is a little tricky, too much and it bows and jams, too little and it shows gaps. It helps to have 6 hands and a calibrated elbow for this. Tension on all wires should be as close to equal as you can get. I used a pair of visegrips and a scrap piece of wood to leverage the wires. Kinda like pulling a nail. The wire will stretch some over time so it's better to go a little tight than too loose. I had some advice on "how to" from a guy I met at Colco in Memphis while shopping for wood, and also from somebody on this board a while back (sorry, don't remember who). That's about it, except I made a minature version out of scrap before I started on the real thing, just to get a feel for how it all has to flow. Good luck. Joe Lyddon, 03-24-2004 09:20 PM Gene, When you say "wire rope", what is it? Stranded...3,4, strands resulting in 1/16" rope? "loops"... are you saying you start on the left or right, string it, loop over to the middle & string it, loop over to end and string it. What do you mean by "loops"? "crimp"... nailed down with a "U" staple? ... or a big knot? Did you have a set of plans to give you an idea of how the tambour was done? I'm not very clear about that "dowel" you're talking about either... Is it OK with you if I editted and added this to my web site? Thank you, Joe Gene, 03-24-2004 10:04 PM I could try to explain wire rope/loops/dowel part in words, but would likely just confuse things even more, so tell you what I'll do is take some pics of how to do this and post it tomorrow. Probably should have done that in the first place, but I was too focused on building it to worry about snapshots. Feel free to put it up on your website - it's not proprietary info. Gene, 03-25-2004 10:01 AM Joe, here's a series of pics showing how to attach the wire rope (aka cable) to the #1 slat. The first 2 are pics of the ferrule and stop pkg, so you'll know what to look for. |

|
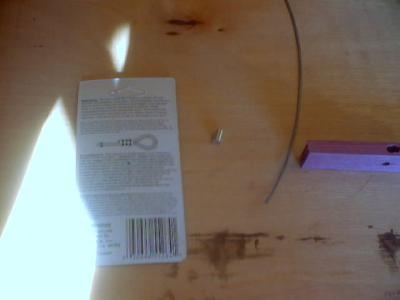
This next is all the components ready to assemble. |
|
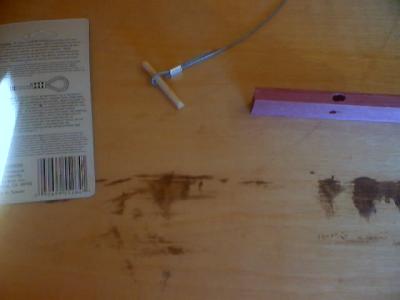
Note: The tiny little mortise in the slat - approx. 3/16" x 3/8" x 7/8" deep, and the small thru hole in the face for the slat for the dowel. I guess you could call this a pinned mortise and tenon. Be careful to not drill all the way thru when making the mortise, and the dowel hole should be centered on mortise about 3/4" down from edge. You need to have some room at the bottom for the loop. Sizing the loop, crimp and trim excess wire rope: |
|
Excess wire rope trimmed and loop installed in slat & pinned with dowel.
Only thing left is trimming the dowel off. |
|
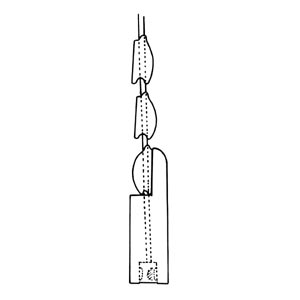
I suppose you could use a metal pin or screw in place of the dowel. You do this sequence for each of the 3 wire rope sections. Then thread the rest of the slats and finish off by crimping a stop on the other end of rope on the completed tambour. Hope this clarifies things. woodshopdemos, 03-25-2004 10:47 AM Gene, Thanks for posting. You have done a magnificient job. The roll top desk is beautiful. Like Joe, I have been trying to figure out the cable method. I appreciate your patience and further posting. I went and googled my way through quite a bit more. I didnt know of the cable method... but it is out there and makes sense. Joe, this diagram is for you. It is not what Gene did exactly but is similar and from the VanDykes restoration catalog: |
|
At the bottom is a set- screw which they sell.
This takes the place of the dowel that Gene used. The VanDyke page is: http://www.vandykes.com/discount_product/02252891/ (Note: Original link went bad... you're on your own here. Sorry, JL) John Lucas http://www.woodshopdemos.com   This site is maintained by: Good-Lyddon Data Systems Copyright © 2004-2010 Joe Lyddon, WoodWorkStuff.net |