|
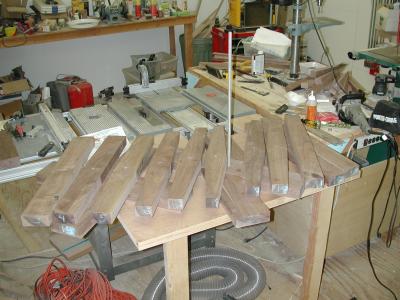
In the spirit of sharing project progress, here are some in-progress photos of my current project. Unlike some of the folks here who truly have skill and experience, I'm much more of a beginner. Hopefully, others in my boat will get something useful out of this as the project progresses. My wife saw some plans for a spiral coffee table that I downloaded from here: The Plans and asked if I could make something similar. I figured I might as well try, though the project will be a stretch for me. I've never shaped wood before, and the end result might not be too pleasing. Only time will tell. I looked over the plans and decided on a couple of modifications. I wanted the table taller and smaller than the plans called for. We'll see when its finished whether I succeeded. So far I'm 2 days into it, and I figure I have probably 10 days to go (which will take several weeks to actually accomplish). The first pic shows some additional wood blanks that I made from offcuts from the stack of blanks. I need 15 blanks to do the project. |
|
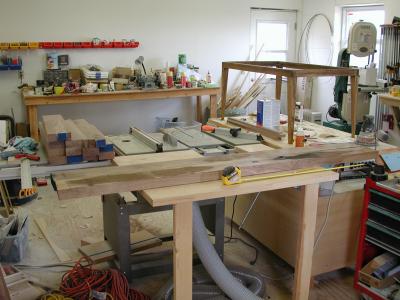
The next shot shows a common problem for new woodworkers like me. I mis-estimated
the amount of wood needed, and had to run back to the lumber yard for more.
I'm using 8/4 walnut, BTW. |
|
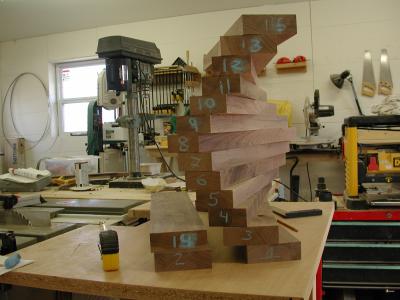
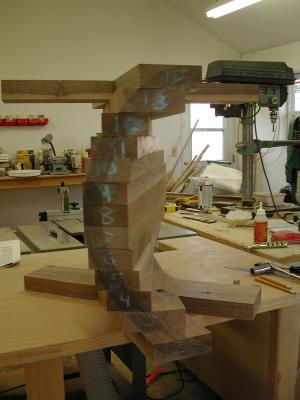
The next shot shows the blanks finished, with the central post hole drilled and stacked.
Its starting to look like spiral. You can see the curve that I've sketched onto
the ends of the pieces. |
|
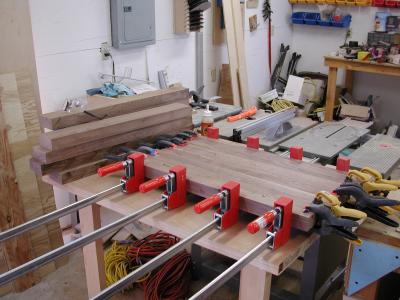
Here is the base that I've cut double biscuit slots in to assist in the glue-up. What
you can't see is the extra slot that I cut when I had the plate joiner set to the
wrong depth. |

|
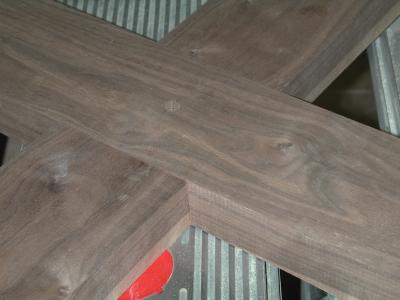
This image shows my first-ever half-lap. The plans indicated that a half-lap
was optional for the top. I decided to go ahead and try. I cut it using my
stacked dado set at 1/2" width. It took me 5 or 6 passes to sneak up on the
correct depth. |
|
Here is the spiral with the curve stenciled in. |
|
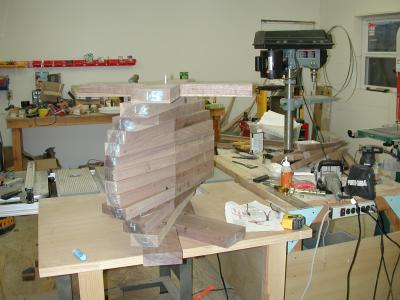
After the I free-handed the curve on both edges, I cut away some waste material to
make the shaping easier. Since I'm a gearhead, I ended up making the markings on
the blanks completely symmetrical. I started in the middle, and used the
measurements on the boards above the center to "copy" the curve onto the boards
below the center. I then used the same measurements to create the curve on the
other side. Once that was done, I could make lines to remove some of the
waste material. |
|
Here is where the project stands this evening. The waste is cut away and the
blanks are ready for glue-up. Tomorrow I'll try to cut the various wedge pieces
that will fill in the top and bottom. I hope to get around to glueing this up in
stages this week. |
|
Links: The Plans   This site is maintained by: Good-Lyddon Data Systems Copyright © 2004-2010 Joe Lyddon, WoodWorkStuff.net |