Knipfer,
One last question I promise. With the hinges installed,
does the wood of the box come together or is there a gap due
to hinge? I am sooo close...
Thanks
goodwood
Thanks Knipfer,
I just didn't drill the hole deep enough because I wasn't sure if
they should be buried. I also appreciate the hint about the
chamfer passing through to holes - I would have spent along
time on that one.
goodwood
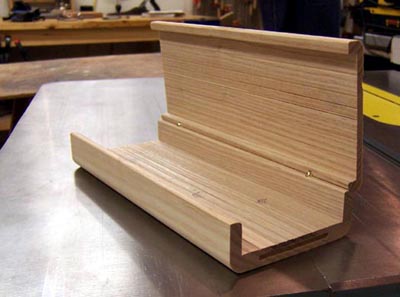
Here is the first attempt (less the remaining details).
Not enough room for the mortice at the bottom but what the hey...
Thanks Dave. This was some scrap oak I had sitting
around.
See the results here.
goodwood
|
Ask away Goodwood... no worries I say... if I was
unwilling to share... well... I'd just make and sell these
things and you folks would never know about it.
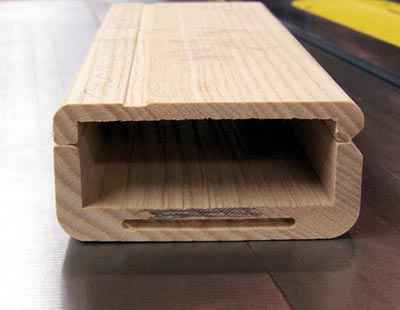
About those hinges... YES... the box should close
tight all around, front and back, when the hinges
are dry fit installed. Just like in my photo above.
There are three reasons I know of why there may be a gap somewhere
... DAMHIKT...
1. Most likely .... your lid-open chamfer
on the back of the box is not deep (wide) enough. The
chamfer needs to pass through the centerline of the hinge hole
plus a SMALL amount more...
If you leave the chamfer short of the hinge hole centerline...
then the leading edges of the box back will contact each
other before the box swings fully open... this will cause
the dry-fit hinges to pull upward slightly and leave a gap at the
back of the box when you close it again.
You will still have a tight gap at the front... but the
back is open a little bit.
If you epoxy the hinges in place without correcting this condition,
then you'll end up with a box that opens to only 80
degrees or so...
2. Less likely ... Your timber is moving around
on you. I'm going to assume you are working with acclimated
timbers... but if for some reason you rushed making the box
it's possible your top has warped.
Of course, you can check this easily on your table saw top....
so I figure this is not your problem.
BTW... when I first re-saw my 8/4 stock to make
a batch of these boxes... I sticker all the parts for a month
at least... then I go to work on them.
3. Even less likely... one of your hinge holes
is not at 90 degrees to the box edges.
Being out of whack at any angle less than 90 degrees
will obviously tend to pull the lid in the opposite direction...
for sure this will leave a small gap adjacent to the offending
hinge hole.
Again, I am assuming you drilled your holes with a DP and are
confident the hinges are sitting straight... but it's worth a
check.
Now... I've made all these errors plus others... trust
me about that... it's all part of learning.
I hope that fixes you up Goodwood!
Knipfer
|