|
This Part is Continued from "Building Little Boxes with David Knipfer - Part 4" Well .... if you made it to here with these little boxes you need some ends to put on them. They can be any shape or size you desire, as long as they are proportionate to the box itself. Here I'll show my method for creating the ends for this design ... I start by sizing the end stock to 0.400" thick in a rectangular shape that will allow 1/4" of hangover all around the box exterior. I prefer to have the grain direction run vertically along the ends .... this allows the ends to expand and contract with the box bodies. 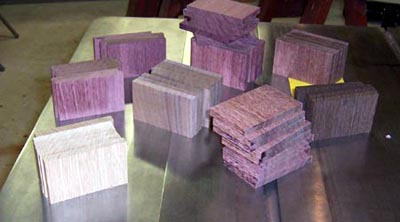
Back to previous step in this seies... I prefer to join the ends to the box bodies with a M/T joint and floating tenon. It's probably not absolutely necessary in a box only 4" wide ..... but if you learn to use your router table to make the joint it's fast, safe and accurate. Basically ... I set up the router table with a 1/8" spiral bit, fence and end stops. The fence and end stops are located so that they define the mortise location ...... the bit protrudes 0.200" to define the mortise depth. The router table set up look like this .... uhhhmm ..... you can see that I happen to grab whatever stuff I have laying around for the set-up .... nothing fancy here. 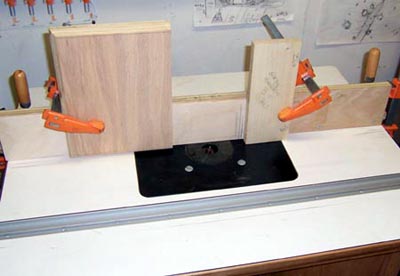
The end mortise is made by simply plunging the part over the spinning bit and moving it from stop to stop ..... then lifting the part off. I know that may sound lind of spooky .... and I hesitated a long time before getting the nerve up to make joints in this manner ..... but it's completely safe if you use a handscrew clamp to hold the parts and keep your hands out of the way .. 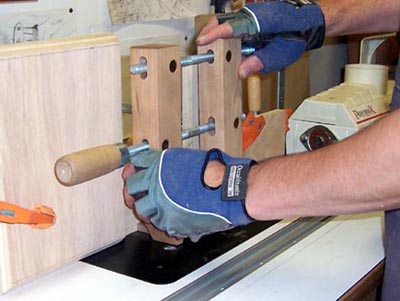
BTW ..... This is the same exact technique that I use to make the mortise in the box bodies. Learning how to safely use your router table to make these small scale joints is an important skill for smaller scale WW'ers. You have achieved the proper fit at the M/T joint when the box end stays attached under the force of gravity ... 
I typically use a section of 3mm plywood for the floating tenons ..... it is almost 1/8" thick and very strong (relatively speaking). You can also make the tenons out of solid stock planed to 1/8" thick ..... if you go this route you need to pay attention to the grain orientation on the tenons ... The grain on your solid stock tenons needs to run across the tenon short direction .... if the grain runs parallel to the tenon long edge, then it will snap in half very easily. Anyways ..... M/T joint or not ..... that rectangular piece of timber is a functional end ..... I now prefer to shape them a little to make them more visually attractive .... I take the ends to my bandsaw and rough in a radius at the top corners and a cut-out on the bottom edge .... 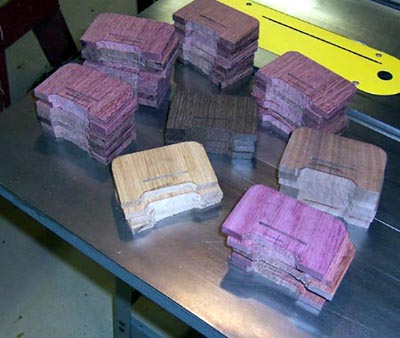
A little work on a disc sander and with my pattern bit router .... and they are finally roughed out .... 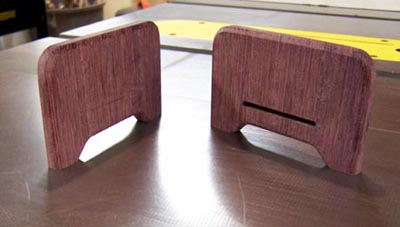
Then ..... just for fun .... we finally get a look at a roughed-out box ... 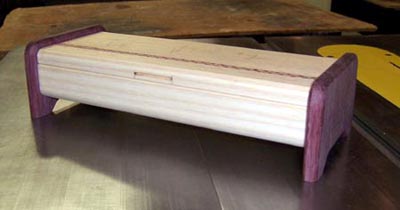
Now ..... it's a bunch of sanding, level the lid inlay, install the sterling silver thumb pull, expoy the ends on, finish the boxes, install the hinges, line the interior and .... Sell them! Enjoy Knipfer On to the next Part of the Series. |

